機能のサブセクション
Logging
2023 July 10
CrySPY 1.2.0からPython標準ライブラリのloggingを採用.
CrySPYのログは画面とファイル(log_cryspy and err_cryspy)の両方に出力される.
- log –> screen and
log_cryspy - error and warning –> screen and
err_cryspy
ログの例:
[2023-07-10 18:40:54,389][cryspy_init][INFO]


Start CrySPY 1.2.0


[2023-07-10 18:40:54,389][cryspy_init][INFO] # ---------- Read input file, cryspy.in
[2023-07-10 18:40:54,390][read_input][INFO] Save input data in cryspy.stat
[2023-07-10 18:40:54,391][cryspy_init][INFO] # ---------- Initial structure generation
[2023-07-10 18:40:54,391][cryspy_init][INFO] Number of MPI processes: 1
[2023-07-10 18:40:54,391][gen_init_struc][INFO] # ------ mindist
[2023-07-10 18:40:54,395][struc_util][INFO] Cu - Cu: 1.32
[2023-07-10 18:40:54,395][gen_init_struc][INFO] # ------ generate structures
[2023-07-10 18:40:54,481][gen_pyxtal][INFO] Structure ID      0 was generated. Space group:   1 -->   1 P1
[2023-07-10 18:40:54,493][gen_pyxtal][INFO] Structure ID      1 was generated. Space group:  28 -->  28 Pma2
[2023-07-10 18:40:54,498][gen_pyxtal][INFO] Structure ID      2 was generated. Space group:  29 -->  29 Pca2_1
[2023-07-10 18:40:54,704][gen_pyxtal][INFO] Structure ID      3 was generated. Space group: 137 --> 137 P4_2/nmc
[2023-07-10 18:40:54,725][gen_pyxtal][INFO] Structure ID      4 was generated. Space group: 212 --> 214 I4_132
[2023-07-10 18:40:54,800][cryspy_init][INFO] Elapsed time for structure generation: 0:00:00.408367
ログを画面に出力させたくないときは下記のように-n オプションをつけて実行する.
cryspy -n
バックアップ
2024 Dec. 22 updated
CrySPYはシンプルなバックアップ機能を備えている. バックアップの対象は以下のファイル:
- cryspy.in
- cryspy.stat
- log_cryspy
- err_cryspy
- debug_cryspy
- cryspy_interactive.ipynb
- calc_in/*
- data/*
work/* は含まれいないので注意.
- (v1.1.0以降) 上記ファイルが日付と時間で名前づけられたディレクトリにコピーされる.以前のバックアップは自動的には削除されない.
- (v1.0.0) バックアップは1世代分のみであり,それより古いものは削除される.
自動バックアップ
自動的にバックアップされるタイミングは次の通り:
- 次の選択に移るとき(BO, LAQA)か世代交代を行うとき (EA)
- 構造を追加するとき
手動バックアップ
手動でバックアップを行いたい場合は,-b または --backup オプションをつけて次のようにcryspyを実行する:
cryspy -b
このコマンドは通常の実行とは異なり,バックアップだけを行います.
クリーン
2024 Dec. 22 updated
CrySPYはシンプルなクリーン機能を備えている. 初めからやり直したい時に便利となる. 以下のファイルがクリーン(実際はファイルを移動するだけ)される.
- cryspy.stat
- log_cryspy
- err_cryspy
- lock_cryspy
- data/*
- work/*
- tmp_gen_struc/*
クリーンする場合は-c または --clean オプションをつけてcryspyを実行する:
$ ls
calc_in  cryspy.in  cryspy.stat  data  err_cryspy  log_cryspy
$ cryspy -c
Are you sure you want to clean the data? 'yes' or 'no' [y/n]: y
$ ls
calc_in  cryspy.in  trash
$ ls trash
20230318_100728
calc_in/* と cryspy.in 以外のファイルがtrashの中の日付と時間で名前づけられたディレクトリに移動します.
必要なければ手動で削除してください.
原子間距離の制限
2025年6月17日 更新
構造生成時に原子間距離の制限を行うことができる. 下記はA-B 2元系における[structure]セクションの最低原子間距離の設定例.
[structure]
natot = 8
atype = A B
nat = 4 4
mindist_1 = 2.0 1.8
mindist_2 = 1.8 1.5
原子A-A,B-BおよびA-B間の最低原子間距離がそれぞれ2.0,1.8および1.5 Åに設定されている. 原子間距離がこの値よりも小さい構造は自動的に棄却される.
3元系では mindist_1,mindist_2およびmindist_3が必要になる.
mindistの行列は対称行列でなければならない.
CrySPY 1.4.0以降では,この最低原子間距離のチェックは構造最適化後にも行われる.
導入した理由は,機械学習ポテンシャルなどでは時々原子がほぼ重なるような構造が得られてしまうため.
cryspy.inで下記のようにすることでこの機能をオフにすることもできる(デフォルトはオン)
[option]
check_mindist_opt = False
Example: Na8Cl8
Without mindist
cryspy.in
[basic]
algo = RS
calc_code = VASP
tot_struc = 5
nstage = 2
njob = 2
jobcmd = qsub
jobfile = job_cryspy

[structure]
natot = 16
atype = Na Cl
nat = 8 8

[VASP]
kppvol = 40 80

[option]
log_cryspy
[2024-04-23 13:46:28,598][cryspy_init][INFO]


Start CrySPY 1.2.3


[2024-04-23 13:46:28,598][cryspy_init][INFO] # ---------- Read input file, cryspy.in
[2024-04-23 13:46:28,598][read_input][INFO] Save input data in cryspy.stat
[2024-04-23 13:46:28,599][gen_init_struc][INFO] # ------ mindist
[2024-04-23 13:46:28,601][struc_util][INFO] Na - Na: 1.66
[2024-04-23 13:46:28,602][struc_util][INFO] Na - Cl: 1.3399999999999999
[2024-04-23 13:46:28,602][struc_util][INFO] Cl - Cl: 1.02
...
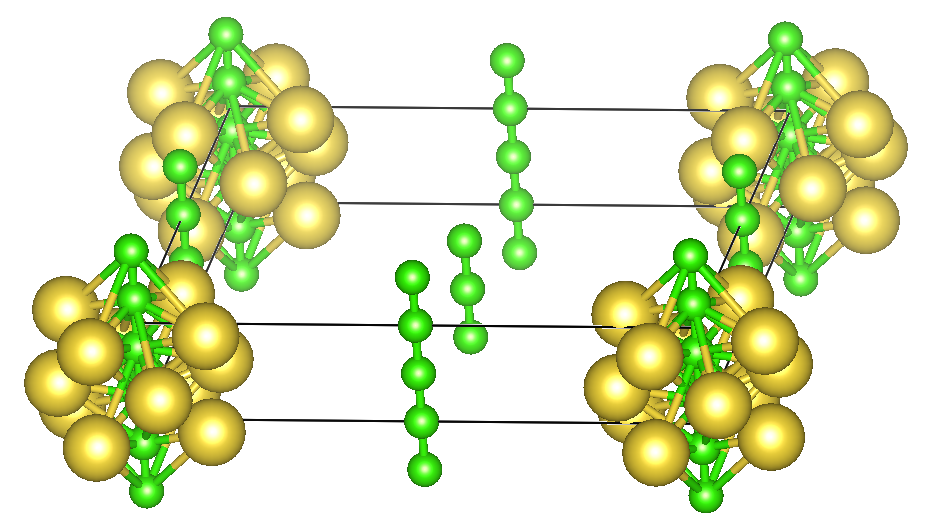
PyXtalのデフォルト設定では,上の図のように原子同士が近すぎる場合があるので,mindistを設定することをすすめる. DFT計算もやりやすくなるであろう.
With mindist
cryspy.in
[basic]
algo = RS
calc_code = VASP
tot_struc = 5
nstage = 2
njob = 2
jobcmd = qsub
jobfile = job_cryspy

[structure]
natot = 16
atype = Na Cl
nat = 8 8
mindist_1 = 2.5 1.5
mindist_2 = 1.5 2.5

[VASP]
kppvol = 40 80

[option]
log_cryspy
[2024-04-23 14:06:21,955][cryspy_init][INFO]


Start CrySPY 1.2.3


[2024-04-23 14:06:21,955][cryspy_init][INFO] # ---------- Read input file, cryspy.in
[2024-04-23 14:06:21,956][read_input][INFO] Save input data in cryspy.stat
[2024-04-23 14:06:21,956][gen_init_struc][INFO] # ------ mindist
[2024-04-23 14:06:21,956][struc_util][INFO] Na - Na: 2.5
[2024-04-23 14:06:21,956][struc_util][INFO] Na - Cl: 1.5
[2024-04-23 14:06:21,956][struc_util][INFO] Cl - Cl: 2.5
イオン結晶のような場合には,カチオン同士,アニオン同士が離れるような設定をしておくと良い.
ジョブファイルの自動書き換え
2025年7月10日 更新
CrySPYのジョブファイルで,CrySPY_IDという文字列は自動的に構造IDに置換される.
PBSやSLURMなどのジョブスケジューラーを使う時,ジョブ名に構造IDを使うと便利である.
例えばPBSでは, #PBS -N Si_CrySPY_IDが#PBS -N Si_15に置き換わる
大抵の場合,ジョブ名は数字から始められないことが多いので,Si_のように英字から始めておくと良い.
また,バージョン1.4.2からは末尾に以下のコマンドを書く必要はなくなった.CrySPYが自動で追記する.
sed -i -e '3s/^sub.*/done/' stat_job
例えばこのようなジョブファイルを./calc_in/job_cryspy(job_cryspyはcryspy.inのjobfileで指定するファイル名)に準備しておくと
#!/bin/sh
#$ -cwd
#$ -V -S /bin/bash
####$ -V -S /bin/zsh
#$ -N Si8_CrySPY_ID
#$ -pe smp 20
####$ -q ibis1.q
####$ -q ibis2.q

mpirun -np $NSLOTS pw.x < pwscf.in > pwscf.out


if [ -e "CRASH" ]; then
    sed -i -e '3 s/^.*$/skip/' stat_job
    exit 1
fi
例えばIDが15の場合,CrySPYが./work/15/job_cryspyを下記のように書き換える.
5行目のCrySPY_IDが15に置換され,末尾にsedのコマンドが追記される.
#!/bin/sh
#$ -cwd
#$ -V -S /bin/bash
####$ -V -S /bin/zsh
#$ -N Si8_15
#$ -pe smp 20
####$ -q ibis1.q
####$ -q ibis2.q

mpirun -np $NSLOTS pw.x < pwscf.in > pwscf.out


if [ -e "CRASH" ]; then
    sed -i -e '3 s/^.*$/skip/' stat_job
    exit 1
fi

# ---------- CrySPY
sed -i -e '3s/^sub.*/done/' stat_job
MPI並列化を用いた構造生成
2023/10/21 update
CrySPYのバージョン1.1.0(1.2.3以上の利用を推奨)からは,MPIを用いたランダム構造生成が可能になった. MPIを使うにはPython環境にmpi4pyをインストールする必要がある. 当然,計算に利用するワークステーション等にMPIライブラリ(Open MPI,Intel MPI,MPICHなど)も必要である.
MPIを使うのに下記が必要
- CrySPY
1.1.01.2.3 or later - mpi4py
- MPI library (Open MPI, Intel MPI, MPICH, etc.)
1.1.0 <= CrySPY <=1.2.2ではバグがあった.
MPIを使ったジョブをbashやzshで実行するとき(e.g., jobcmd = zsh, jobfile = job_cryspy),MPIのジョブが流れない.
qsubやsbatchでジョブスケジューラーを使う場合は問題ない。
このバグはバージョン1.2.3で修正.
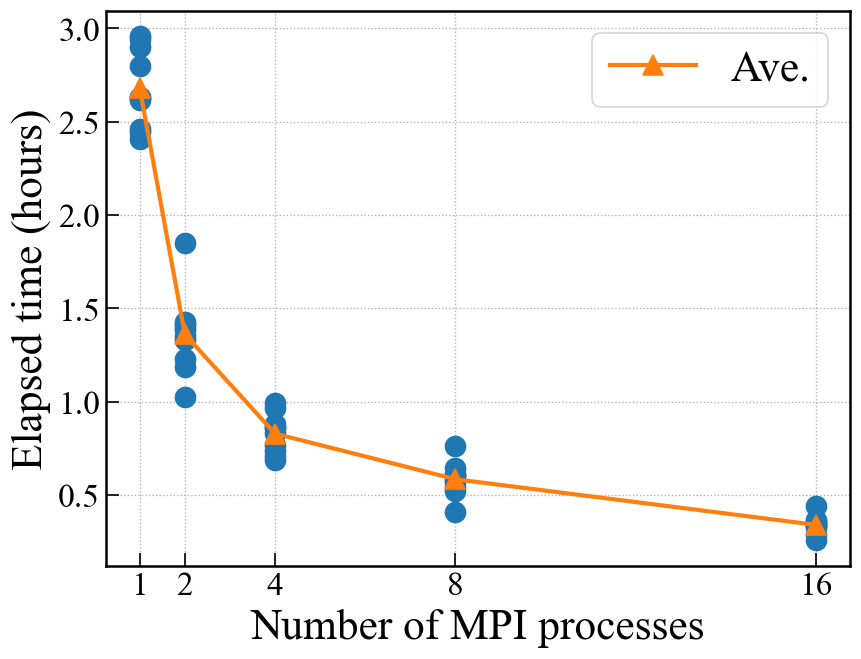
下の図にSi8原子1000構造をランダムに生成するのにかかった時間とMPIプロセス数の関係を示す.下記のセッティングを使った.
[basic]
algo = RS
calc_code = soiap
tot_struc = 1000
nstage = 1
njob = 2
jobcmd = zsh
jobfile = job_cryspy

[structure]
natot = 8
atype = Si
nat = 8
mindist_1 = 2.2
mindset_1 = 2.2のように厳し目に設定して,わざと時間がかかるようにしてある.
それぞれのプロセス数において10回ずつ実行して,平均を線で結んでいる.
Run
mpiexec -n 4 cryspy -p
Enthalpy
2023/10/18
Requirements:
- CrySPY 1.2.2 or later
- VASP or QE
高圧化における構造探索を行う時に, エネルギーの代わりにエンタルピーを使うことができる. VASPとQE以外はまだ未対応.
cryspy_rsltやcryspy_rslt_energy_ascのE_eV_atomの箇所がエンタルピー(eV/atom)に変わる.
下記は40 GPaにおけるSr4O4の構造探索の結果の例.
高圧下ではCsCl型構造(ID 5)がNaCl型構造よりも安定になっている.
   Spg_num Spg_sym  Spg_num_opt Spg_sym_opt  E_eV_atom  Magmom      Opt
5       26  Pmc2_1          221       Pm-3m  -2.276790     NaN     done
6      225   Fm-3m          225       Fm-3m  -2.244800     NaN     done
1      101  P4_2cm          107        I4mm  -2.181115     NaN     done
4      123  P4/mmm          123      P4/mmm  -2.034509     NaN  not_yet
3       20  C222_1           63        Cmcm  -0.686541     NaN     done
2       75      P4           75          P4  -0.008713     NaN  not_yet
9       51    Pmma           47        Pmmm   0.096430     NaN     done
8       65    Cmmm          123      P4/mmm   1.099657     NaN     done
0      187   P-6m2          187       P-6m2   1.292124     NaN     done
7       53    Pmna           53        Pmna   5.153504     NaN  not_yet
VASP
CrySPYではOSZICARからエネルギー(エンタルピー)を読んでいる.
これはPSTRESSがINCAR_xで以下のようにセットされると自動的にエンタルピーに変わる:
PSTRESS = 400
cryspy.inでは特に何もする必要はない.
energy_step_flagのオプションも使用可能でエンタルピーを読み込める.
Example: CrySPY utility > examples > qe_Sr4O4_RS_pv_term
QE
エンタルピーを読むためにはcryspy.inのQEセクションでpv_term = Trueをつける:
[QE]
qe_infile = pwscf.in
qe_outfile = pwscf.out
kppvol =  40  80
pv_term = True
QEの入力ファイルでもpressの設定を忘れずに:
 &cell
    press = 400
 /
QEではenergy_step_flagオプションでエンタルピーを読むことにまだ未対応.
As library
2024 May 31
Requirements:
- CrySPY 1.3.0 or later
Cryspy can be used as a library to generate random structures or structures by evolutionary algoritym. The jupyter notebook is available in CrySPY utility > notebook > as_library.
Random structure generation
####
#### when you change set_logger(), you need to restart the kernel
####
from cryspy.util.utility import set_logger    # optional
set_logger()    # optional
#set_logger(noprint=True, logfile='log_cryspy', errfile='err_cryspy')    # write log and err messages to files

from cryspy.RS.gen_struc_RS import gen_pyxtal

nstruc = 10
atype = ('Na', 'Cl')
nat = (4, 4)
mindist = ((2.0, 1.5),
           (1.5, 2.0))
spgnum = 'all'

init_struc_data = gen_pyxtal.gen_struc(
    nstruc=nstruc,
    atype=atype,
    nat=nat,
    mindist=mindist,
    spgnum=spgnum,
)
You can get init_struc_data (dict: {ID: pymatgen Strcture, …})
Structure generation by evolutionary algorithm
Situation: parent A (, parent B) –> child
Prepare two (one) parent structures as pymatgen Structure object.
In this example, just use the results of RS for Cu4Au4 (see, CrySPY utility > notebook > as_library).
import pickle
with open('./Cu4Au4_sample/opt_struc_data.pkl', 'rb') as f:
    opt_struc_data = pickle.load(f)
Crossover
from cryspy.EA.gen_struc_EA import crossover

# you can change parent_A and parent_B
parent_A = opt_struc_data[0]
parent_B = opt_struc_data[1]

atype = ('Cu', 'Au')
nat = (4, 4)
mindist = ((1.5, 1.5),
           (1.5, 1.5))

child = crossover.gen_child(
    atype=atype,
    nat=nat,
    mindist=mindist,
    parent_A=parent_A,
    parent_B=parent_B,
)

# child: pymatgen Structure
Permutation
from cryspy.EA.gen_struc_EA import permutation

# you can change parent_A
parent_A = opt_struc_data[0]

atype = ('Cu', 'Au')
nat = (4, 4)
mindist = ((1.5, 1.5),
           (1.5, 1.5))
ntimes = 1    # number of times to perform permutatio

child = permutation.gen_child(
    atype=atype,
    mindist=mindist,
    parent_A=parent_A,
    ntimes=ntimes,
)

# child: pymatgen Structure
Strain
from cryspy.EA.gen_struc_EA import strain

atype = ('Cu', 'Au')
nat = (4, 4)
mindist = ((1.5, 1.5),
           (1.5, 1.5))
sigma_st = 0.05    # standard deviation of strain

child = strain.gen_child(
    atype=atype,
    mindist=mindist,
    parent_A=parent_A,
    sigma_st=sigma_st,
)
Situation: parent group, fitness –> children
Data set
Prepare structure and fitness (energy) data as dict. The key is structure ID. In this example, just use the results of RS for Cu4Au4 (see, CrySPY utility > notebook > as_library)..
e.g.
struc_data = {0: (pymatgen Structure), 1: (pymatgen Structure), …}
fitness = {0: 0.019632287242441926, 1: -0.005437509701440302, …}
import pickle
with open('./Cu4Au4_sample/opt_struc_data.pkl', 'rb') as f:
    opt_struc_data = pickle.load(f)
with open('./Cu4Au4_sample/rslt_data.pkl', 'rb') as f:
    rslt_data = pickle.load(f)

struc_data = opt_struc_data    # dict
fitness = rslt_data['E_eV_atom'].to_dict()    # you may include None or np.nan for values
Survival of the fittest
from cryspy.EA.survival import survival_fittest
from cryspy.EA.gen_struc_EA.select_parents import SelectParents
from cryspy.EA.gen_struc_EA import crossover, permutation, strain

n_fittest = 5    # number of survivors

ranking, _, _ = survival_fittest(
    fitness=fitness,
    struc_data=struc_data,
    elite_struc=None,
    elite_fitness=None,
    n_fittest=n_fittest,
    fit_reverse=False,
    emax_ea=None,
    emin_ea=None,
)

# ranking <-- e.g. [2, 1, 0, 7, 9] without structure duplicaiton
Select parents class
sp = SelectParents(ranking)    # after set_xxx, we can use sp.get_parents(n_parent)
sp.set_tournament(t_size=2)
Crossover
atype = ('Cu', 'Au')
nat = (4, 4)
mindist = ((1.5, 1.5),
           (1.5, 1.5))
n_crsov = 5    # number of structures to be generated by crossover
#id_start = len(init_struc_data)  # next Structure ID
id_start = 10

co_children, co_parents, co_operation = crossover.gen_crossover(
    atype=atype,
    nat=nat,
    mindist=mindist,
    struc_data=struc_data,
    sp=sp,
    n_crsov=n_crsov,
    id_start=id_start,
)

# co_children <-- dict {ID: pymatgen Structure, ID: pymatgen Structure, ...}
# co_parents  <-- e.g. {10: (2, 7), 11: (2, 1), 12: (2, 1), 13: (0, 2), 14: (2, 1)}
# co_operation <-- e.g. {10: 'crossover', 11: 'crossover', ...}
Permutation
n_perm = 5    # number of structures to be generated by permutation
#id_start = len(init_struc_data) + n_crsov   # next Structure ID
id_start = 15
ntimes = 1    # number of times to perform permutation

pm_children, pm_parents, pm_operation = permutation.gen_permutation(
    atype=atype,
    mindist=mindist,
    struc_data=struc_data,
    sp=sp,
    n_perm=n_perm,
    id_start=id_start,
    ntimes=ntimes,
)

# pm_children <-- dict {ID: pymatgen Structure, ID: pymatgen Structure, ...}
# pm_parents  <-- e.g. {15: (2,), 16: (1,), 17: (2,), 18: (1,), 19: (1,)}
# pm_operation <-- e.g. {15: 'permutaion', 16: 'permutation', ...}
Strain
n_strain = 5    # number of structures to be generated by strain
#id_start = len(init_struc_data) + n_crsov + n_perm   # next Structure ID
id_start = 20
sigma_st = 0.05    # standard deviation of strain

st_children, st_parents, st_operation = strain.gen_strain(
    atype=atype,
    mindist=mindist,
    struc_data=struc_data,
    sp=sp,
    n_strain=n_strain,
    id_start=id_start,
    sigma_st=sigma_st,
)

# st_children <-- dict {ID: pymatgen Structure, ID: pymatgen Structure, ...}
# st_parents  <-- e.g. {20: (1,), 21: (2,), 22: (0,), 23: (2,), 24: (2,)}
# st_operation <-- e.g. {20: 'strain', 21: 'strain', ...}
Interactive mode
2025年3月6日
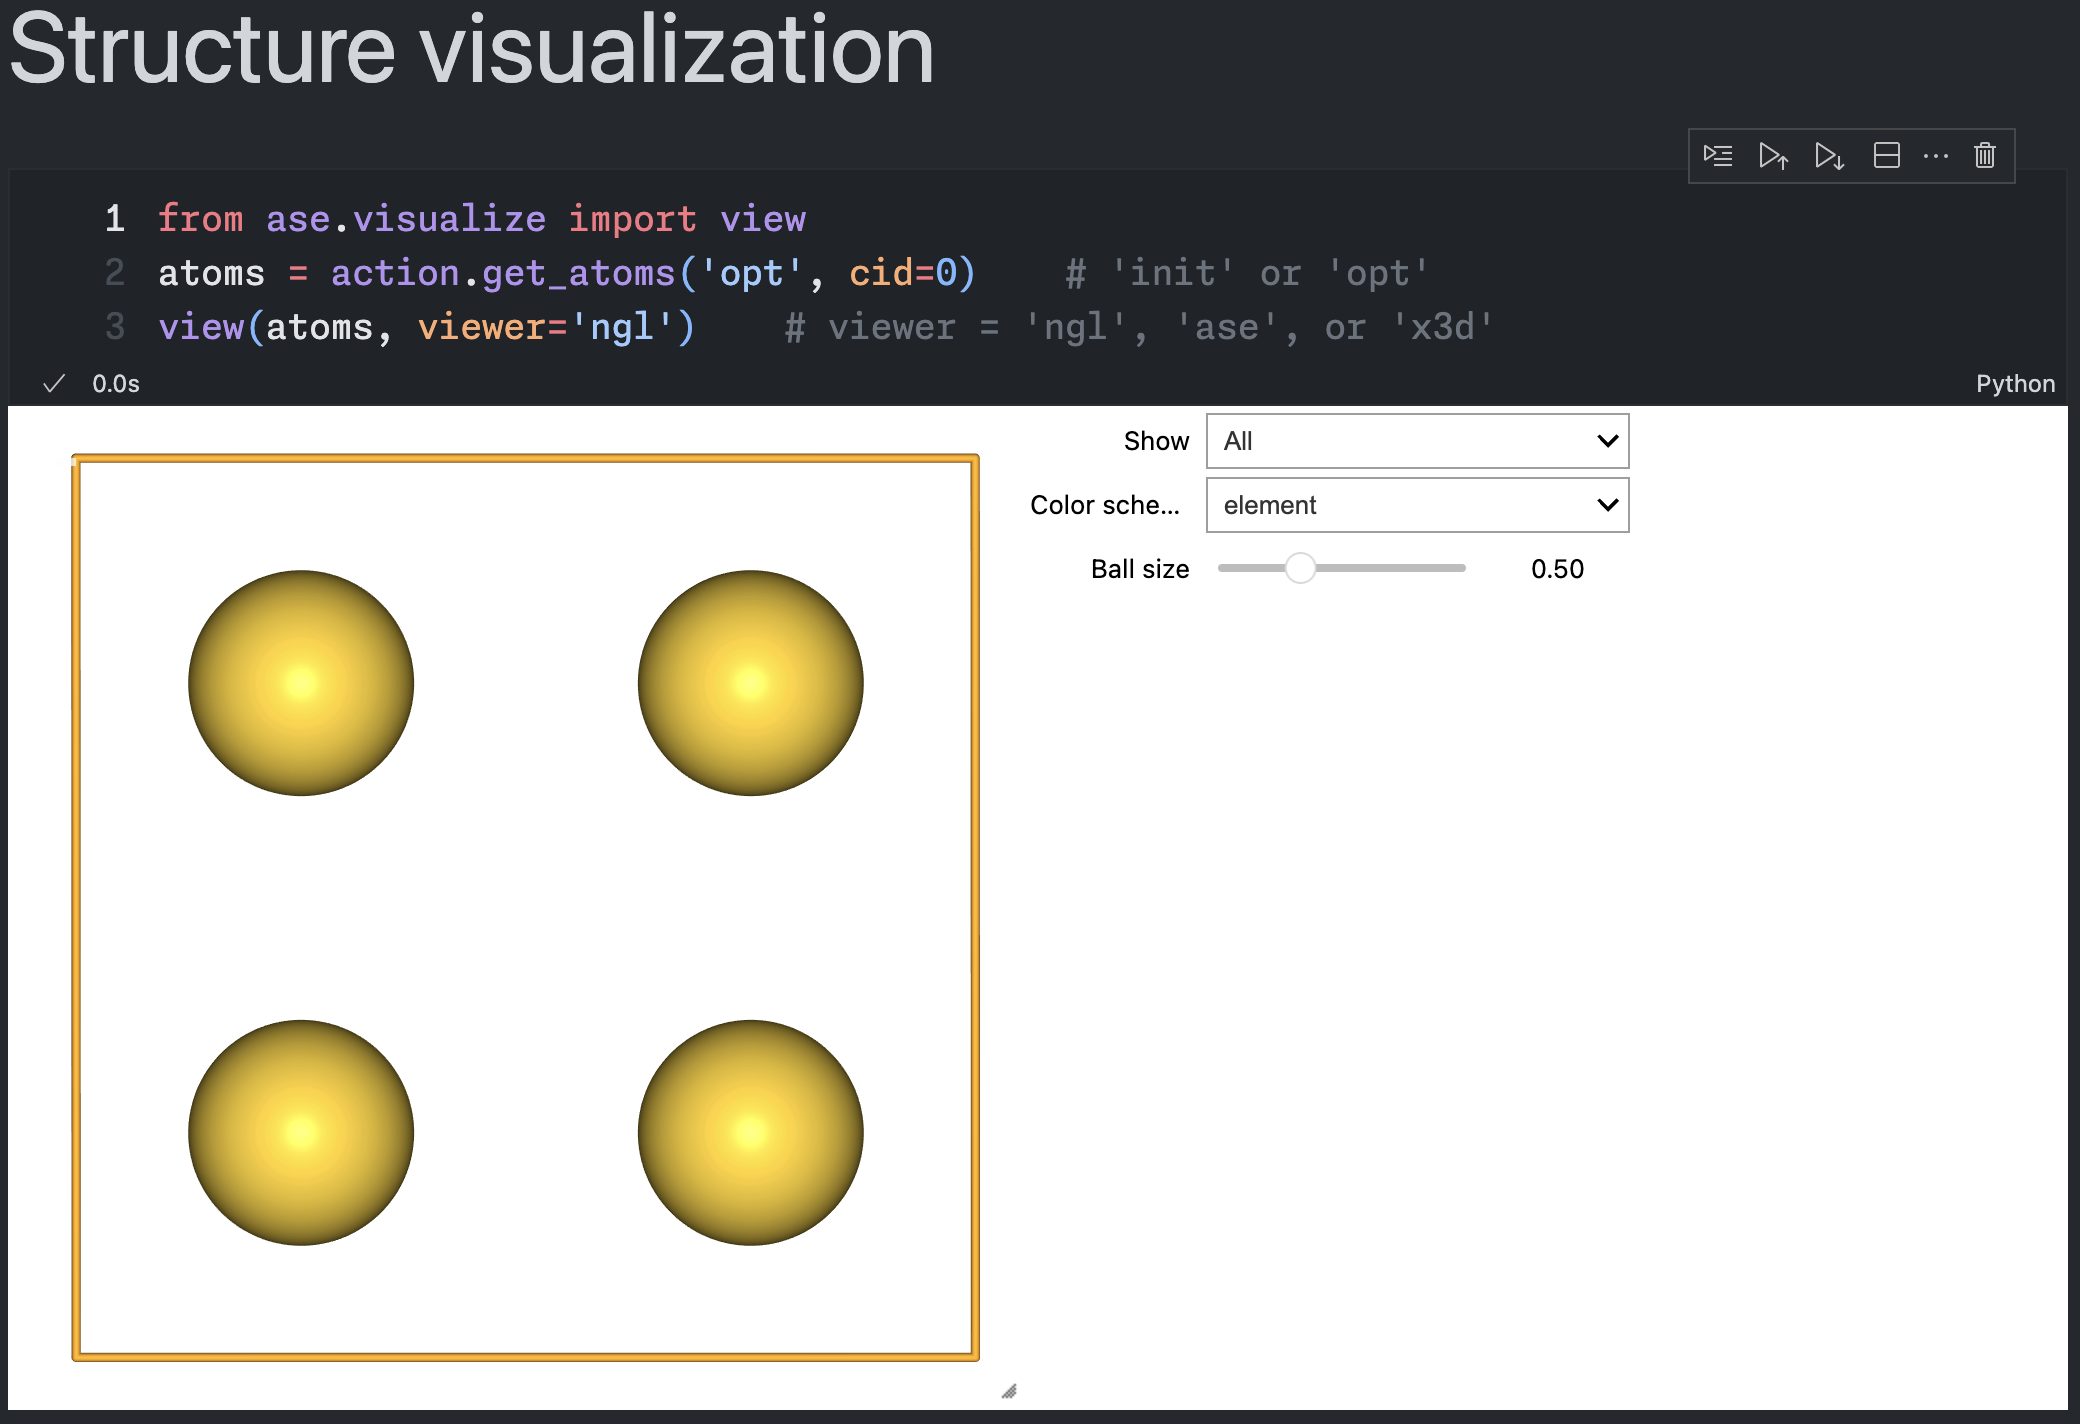
PCクラスタやスパコンなどの利用に慣れてない人でも使えるように,Jupyter Notebookを用いたインタラクティブモードが利用可能になった. ASEを使った構造最適化計算を想定しているので,ASE対応の汎用機械学習ポテンシャルなどが使える.
詳細な使い方はチュートリアル > インタラクティブモード(Jupyter Notebook)を見ること.
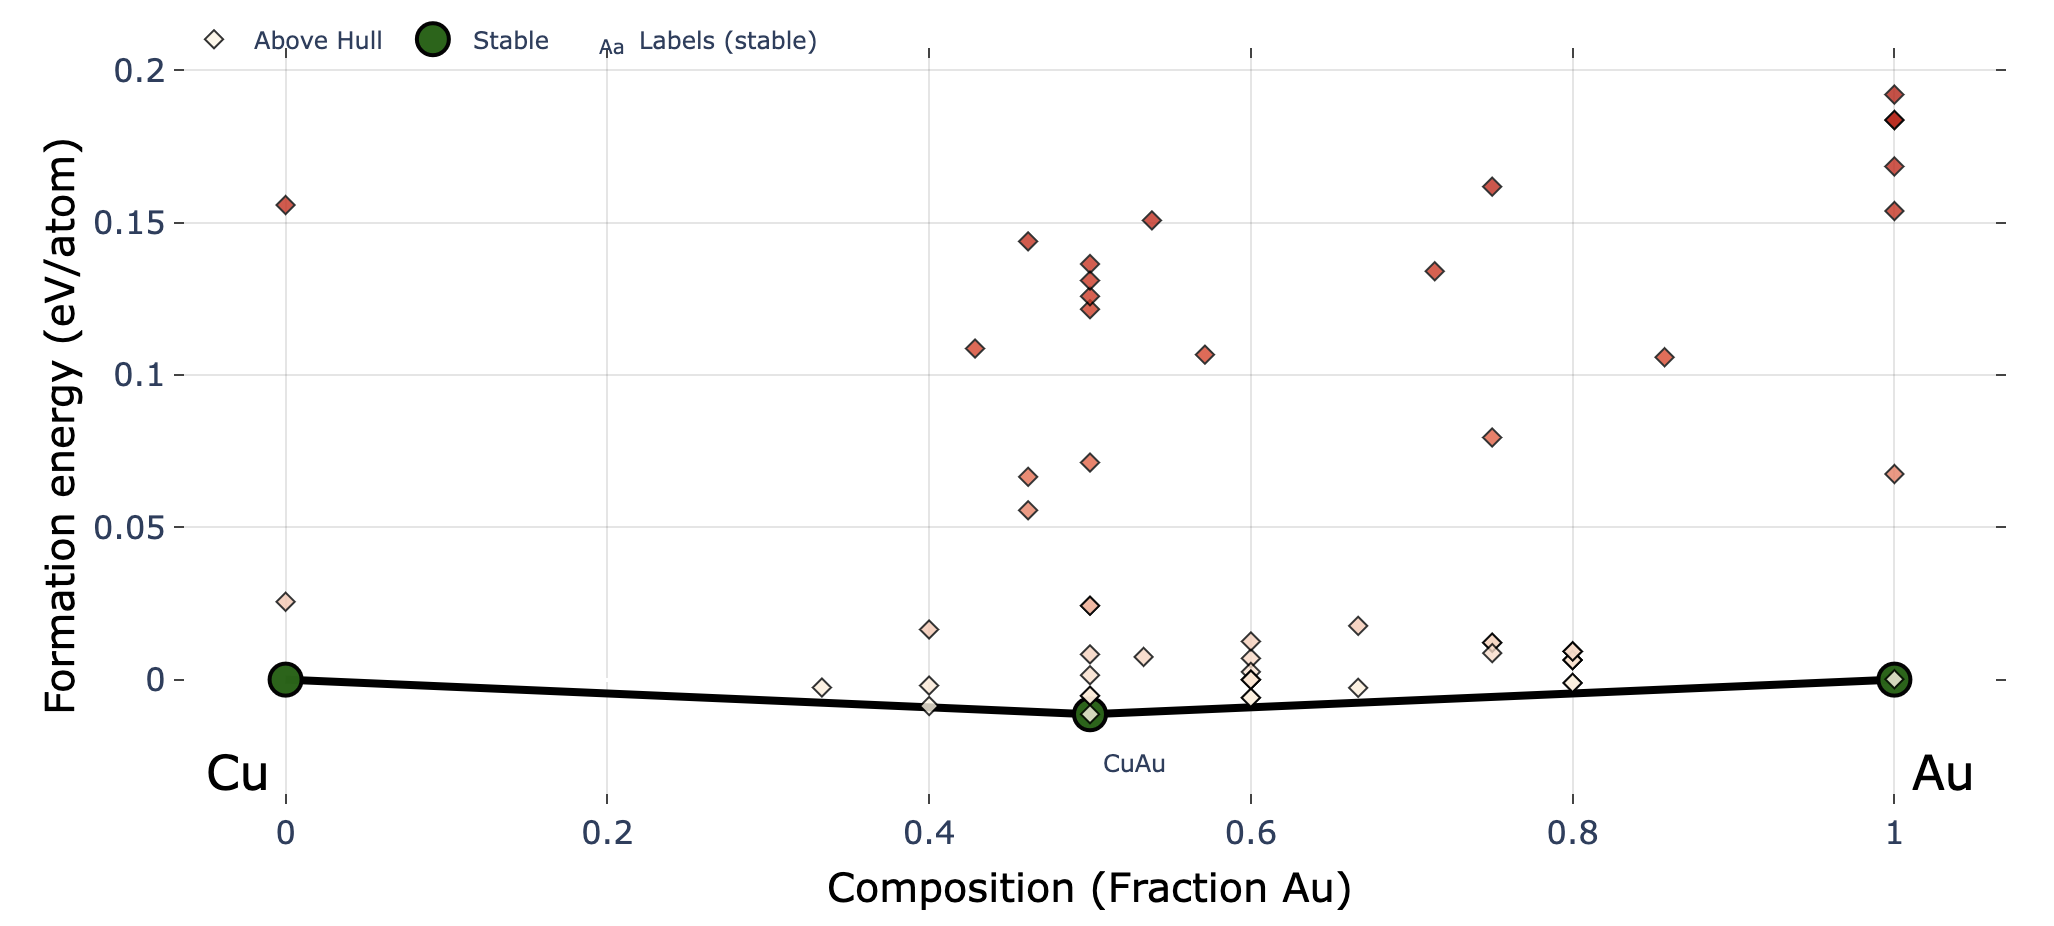
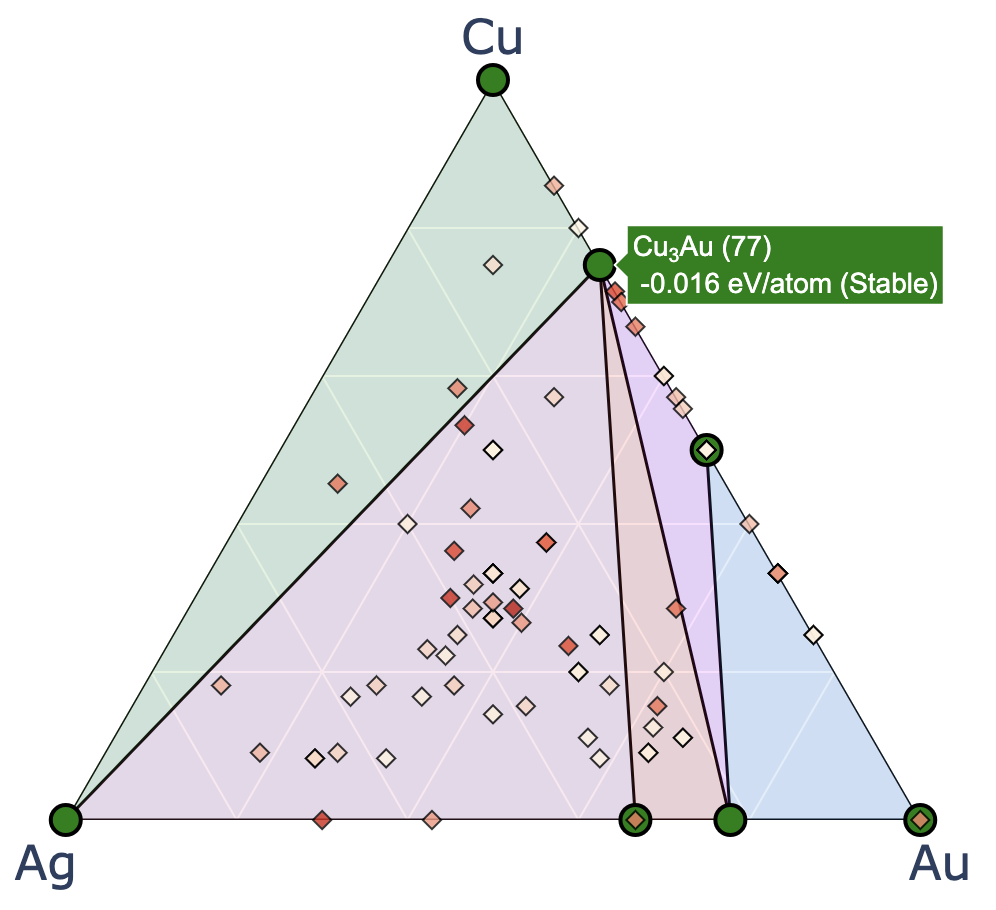
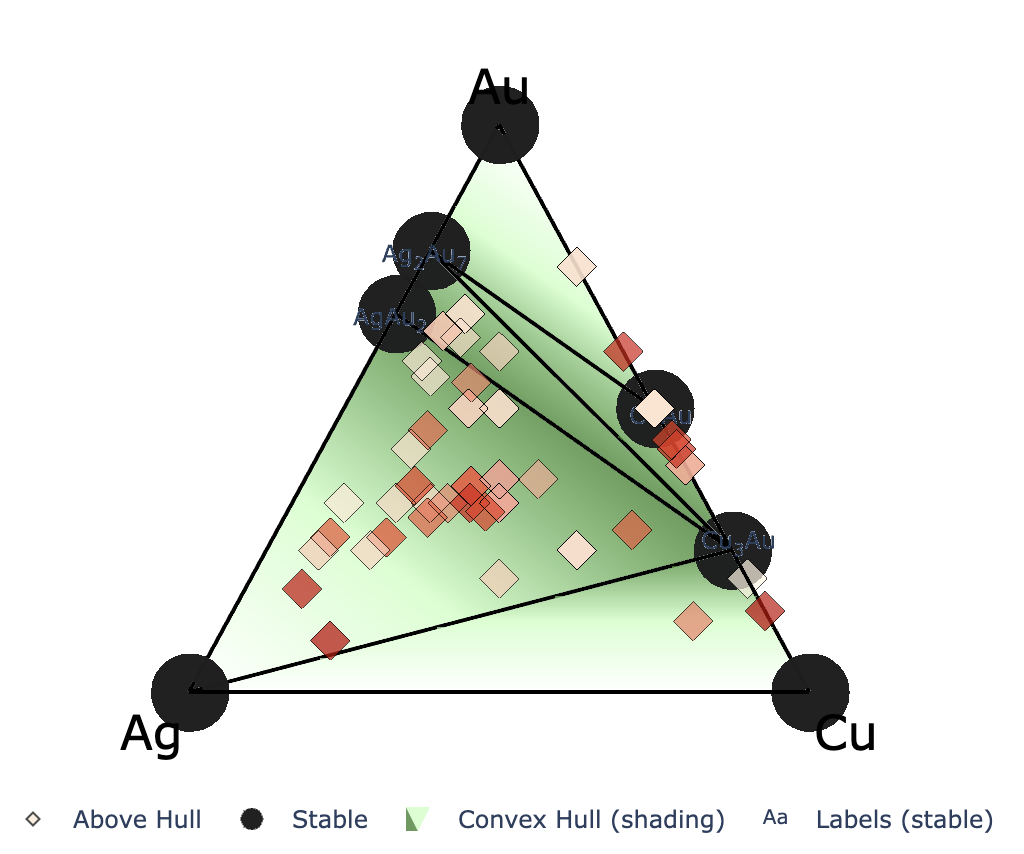
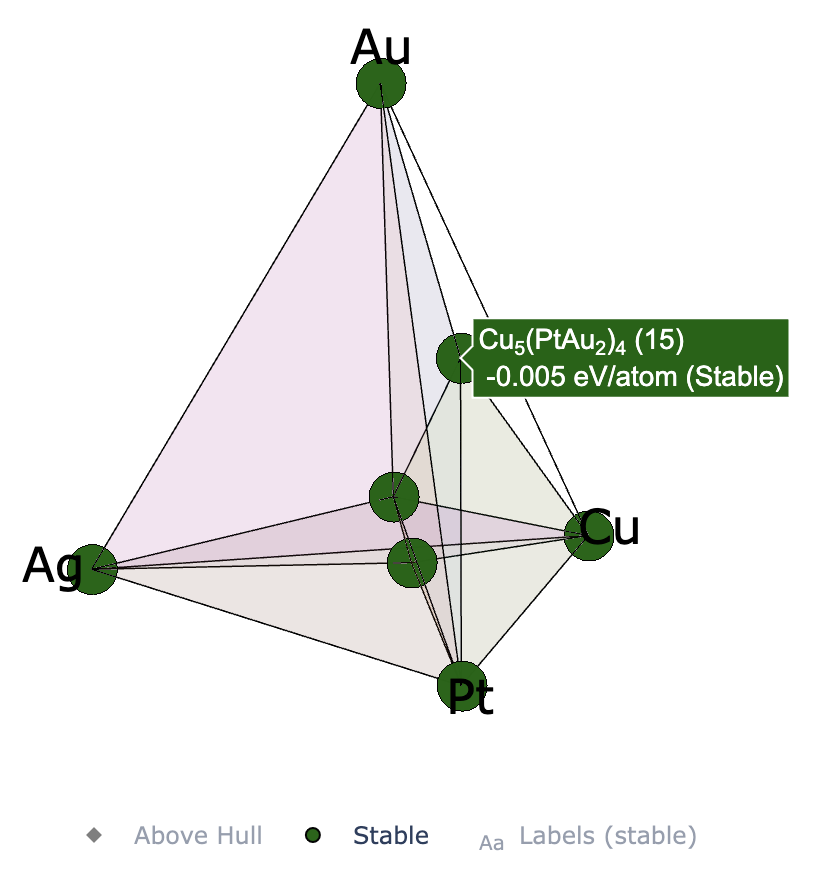
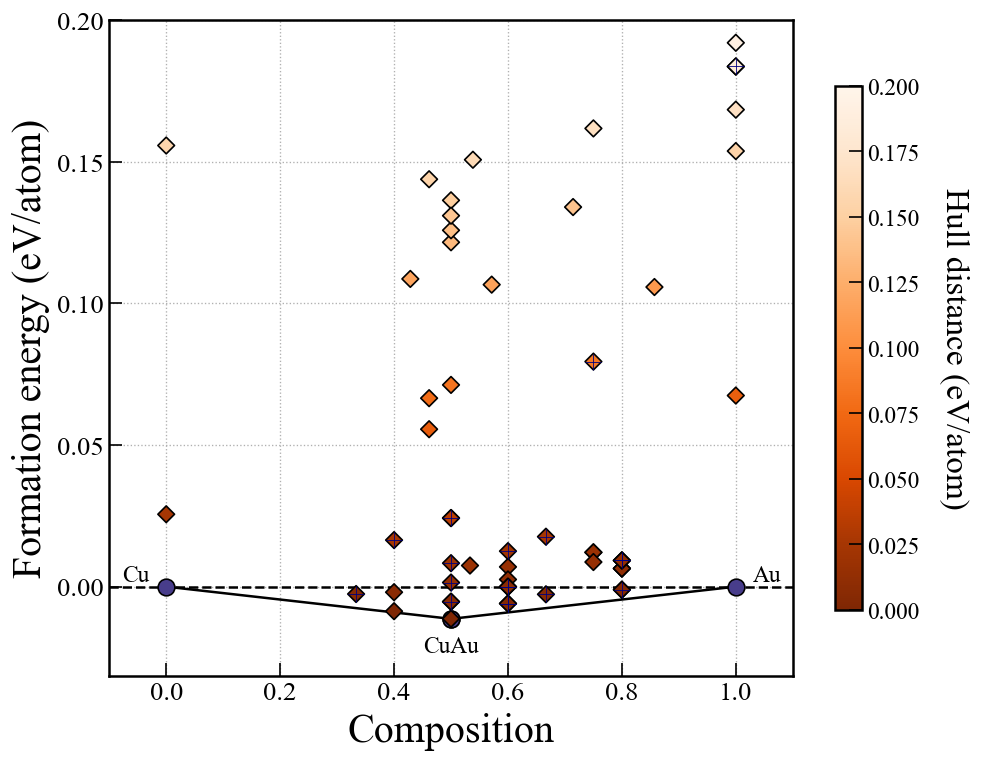
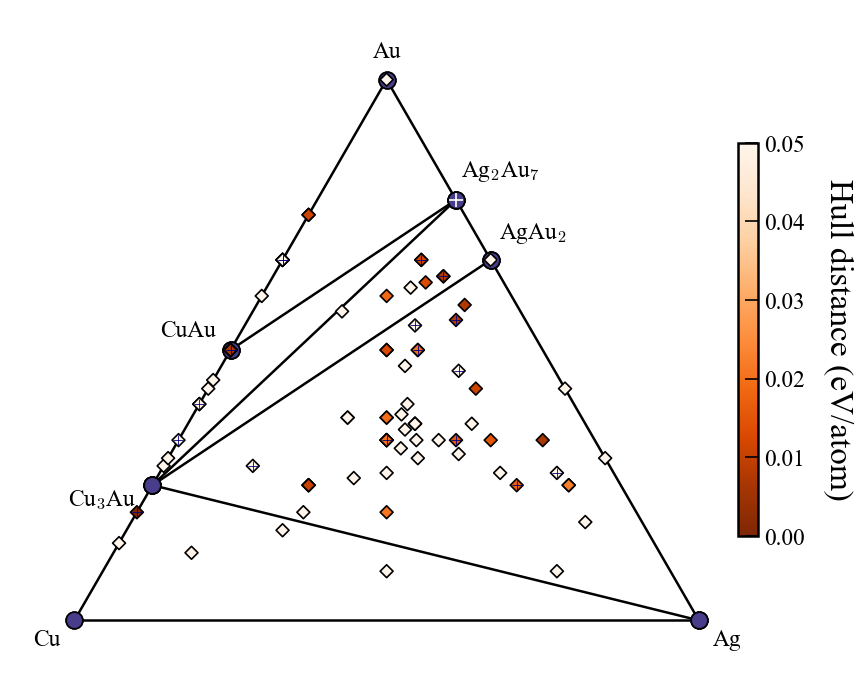
凸包の再プロット
2025年7月3日
CrySPYバージョン1.4.1からcryspy-Eplotというコマンドがインストールされる.
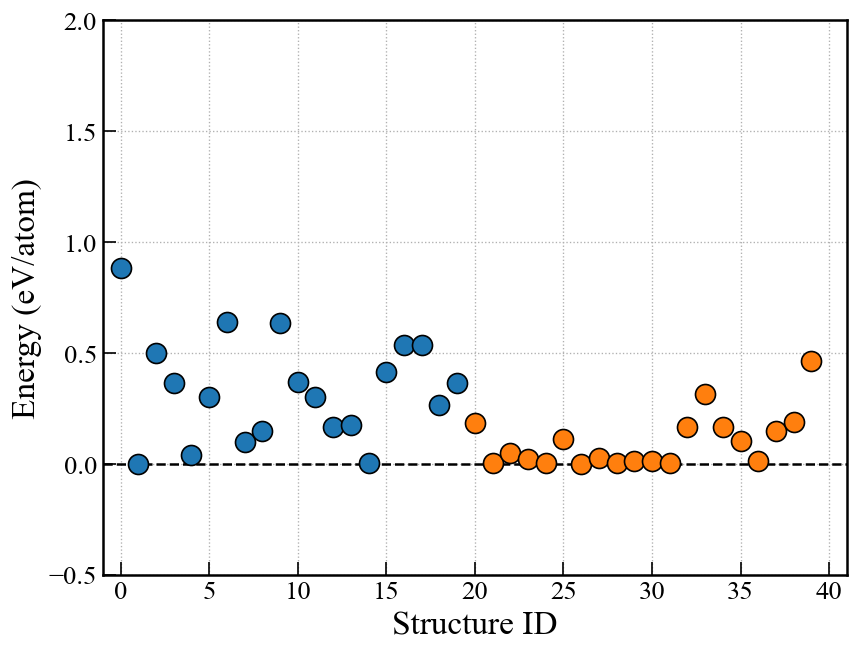
EA-vcでは各世代の計算が終わるごとに自動で凸包の図をプロットして保存しているが,プロット時のパラメータを後で調整したい場合にはcryspy-Eplotコマンドを用いて再プロットできる.
使い方
cryspy.inの[EA]セクションで直接以下のパラメータを変更し,cryspy-Eplotを実行する.
- cgen
- show_max
- label_stable
- vmax
- bottom_margin
- fig_format
cgenはどの世代までプロットに入れるかのパラメータ.デフォルトはNoneで最新世代まで.
EA-vcでは各世代の計算が終わった時点で凸包の計算を行うので,計算途中の世代番号をcgenで指定するとエラーが出る.
画像ファイルは./data/convex_hull/conv_hull_gen_{cgen}.{fig_format}に上書き保存される.
他のパラメータの詳細はCrySPY > チュートリアル > 組成可変型進化的アルゴリズム(EA-vc) > 解析と可視化を参照すること.
電荷中性条件
2025年7月5日
バージョン1.4.1からEA-vcにおいて,構造生成の際に電荷中性条件を課すことが可能になった. ランダム構造生成にも進化的操作による構造生成にも適用できる.
cryspy.inでそれぞれのatypeに対応する電荷をchargeとして入力する.
cryspy.inの例:
...
[structure]
atype = Li Ca Cl
ll_nat = 0 0 0
ul_nat = 8 8 8
charge = 1 2 -1
...
例えばこの場合,(Li, Ca, Cl) = (4, 0, 4)や(Li, Ca, Cl) = (4, 2, 8)などの電荷中性条件を満たす構造のみ生成される.
下記のようにadd_maxやelim_maxが小さすぎると,原子を追加,削除する際に電荷中性条件を満たす原子数の組合せがゼロになって構造生成できなくなるので注意.
...
[structure]
atype = Li Ca Cl
ll_nat = 0 0 0
ul_nat = 8 8 8
charge = 1 2 -1
...
...
[EA]
add_max = 1
elim_max = 1
例えば上記の場合,add_max = 1の場合,電荷中性条件を満たす原子数の組合せはゼロ.add_max = 2の場合,(Li, Ca, Cl) = (1, 0, 1),つまりLiとClを1個ずつ追加する組合せは(+1) + (-1) = 0で電荷中性条件を満たす.add_max = 3であれば(Li, Ca, Cl) = (1, 0, 1), (0, 1, 2)の組合せがある.
計算のスキップ
2025年7月15日
計算途中でskip
DFT計算などで電子状態がどうしても収束しない場合や,明らかに不安定な構造で途中で計算をやめたい場合,下記の手順でskipできる.
- qdelなどでジョブを止める
./work/xxx/stat_jobの3行目をskipに書き換える- 通常通りcryspyを実行
これで,この構造は切り捨てられて,計算が次へ進む.
cryspy_rslt (rslt_data.pkl) に記録された後にskip
CrySPY version 1.4.2以上
正しくない電子状態等で計算が終わった場合,エネルギーが過剰に低く出力されて,rslt_dataに記録されてしまうことがある.例えば下記の結果は,ID 198のエネルギーが低くなりすぎてしまっている.
cryspy_rslt_energy_asc
     Gen  ...  E_eV_atom  Ef_eV_atom ...
198   10  ...  -5.542899   -1.800631 ...
157    8  ...  -5.598984   -0.356639 ...
186   10  ...  -6.323099   -0.330717 ...
95     5  ...  -6.317931   -0.325549 ...
このデータを取り消してskipするためには,バージョン1.4.2から自動でインストールされるコマンドを使う.
cryspy-skip 198
もしskipさせたい構造が複数あるなら,複数のIDを入力する.
cryspy-skip 198 157
これでデータが更新される.
EAまたはEA-vcの場合
EAやEA-vcの場合,skipする構造がエリート構造として登録されている可能性もある.cryspy-skipコマンドを使うとelite_struc.pklとelite_fitness.pklに保存されているデータからskipする構造を取り除く.
EA-vcの凸包の再計算
EA-vcの場合,skipする構造のエネルギーが凸包計算に影響を与える場合がある.そのため,skipさせたあとは,下記コマンドで凸包の再計算を行っておく.
cryspy-calc-convex-hull 10
上記入力の10は世代を表し,10世代時点での凸包の再計算,凸包プロットを行う.
